Step-By-Step Guide to Decor Weave application
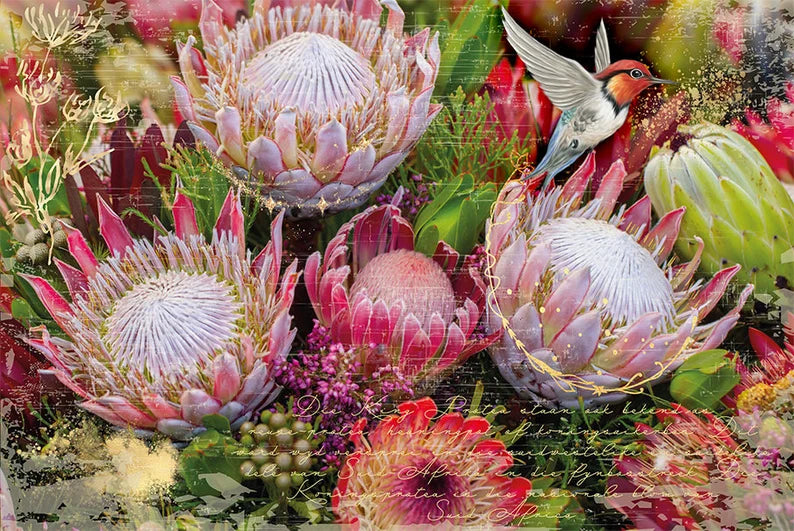
Are you ready to embark on a furniture transformation journey that's creative and produces an original masterpiece? Hokus Pokus décor weaves are easy to use and available in many designs.
See our Lazy Susan below that has been adorned with the "Sunshine" decor weave.

Hokus Pokus decor weaves can be applied to many surfaces including natural wood, painted furniture, or any smooth surface you fancy. Lets dive into the method to apply your decor weave and give new life to your furniture or decor projects.
Materials for Application
It's time to gather the tools we need for our transformation:
- A piece of furniture (or decor) longing for a makeover
- Hokus Pokus Décor Weave Design
- Paintbrush and/or roller
- Brayer to smooth out any wrinkles (Optional - you could also use a small wad of Glad wrap!)
- Water-based sealer for adhesion
- 340 grit sanding pads
- Clean, damp cloth for a pristine canvas
- Iron (on the dry setting)
1. Prepare Your Canvas
Clean and prepare your artistic canvas, whether a piece of furniture, decor or even a lamp shade. Ensure there are no lumps, dust or debris to avoid any disappointment later. You may choose to:
- paint a furniture item
- apply to a blank canvas
- apply to a decor item such as lazy susan, lamp, breakfast tray
Whatever the project you choose, ensure the surface is clean and/or painted. If your project has a chalk paint surface, you will need to use a sealer on the chalk paint first. We use either Fusion Tough Coat Matte OR Artisan Flat Matte Sealer. When making your choice of sealer, consider that a matte sealer will usually be the best option rather than a gloss finish. Of course, that's up to you.
🔥 HOT TIP: A light colour is often the best choice on the surface where your decor weave will be applied. For example, a white surface will help the decor weave maintain its vibrancy. If you're not sure on the back ground colour to use, place your decor weave over a light and dark surface to see how your decor weave will work best for your project.
2. Unfold the Inspiration
Remove your Décor Weave from its packaging and let the WOW factor commence. Using a cool, dry iron setting, gently iron the back of the weave to bid farewell to any fold lines – A piece of baking paper between your decor weave and iron is advisable.
3. Sealer used as "glue"!! Apply the foundation
Apply a water-based sealer to the areas where your décor weave will work its magic. Think of it as laying the groundwork for a masterpiece. The sealer will work as the "glue".
4. Weave the Magic
Gently smooth your Décor Weave down using your hands, brayer or a small bundle of glad wrap. That's right Glad Wrap!! Who would have thought?? Take your time and work on small sections. Hokus Pokus decor weaves are very forgiving in that you can lift them up to adjust. (Make sure you've left enough sealer and try not to stretch the weave. Apply more sealer after lifting if required). Ensure there are no air bubbles or creases to disturb your look.
Hot tip: Try not to cause too much friction or rub up the surface.
5. Allow the Magic to Settle
Once your décor weave is in place, let it dry completely. You're almost there. How exciting to be transforming your project with these beautiful weaves!! This is the moment where the magic truly settles and transforms your furniture. Stand back and take a look at your emerging masterpiece!!
6. Remove the excess
You may have some excess decor weave. For example, edges on a drawer front. To remove the excess, use sandpaper (start with a 240 grit) on a 45 degree angle and slowly pass the sandpaper across the edge. This will both remove the excess as well as make a nice crisp line on your project.
7. Blend Around the Edges
Depending on your project, you may find that the decor weave doesn't quite cover your surface. If this is the case, consider a few of the following options to blend the edges of your weave.
- Paint - pick a few colours out of your weave to dab, brush and blend around the edges making a shaded look.

We blended the edges of this art work with Chocolate from Fusion Mineral Paint and Gold Leaf. Step outside your comfort zone and try new things.
- Texture - Apply a texture finish around the edges. After your weave has dried, apply paint texture around the edges to ensure a seamless integration with your piece. We like to use Artisan Salt Impasto mixed with paint. Let your creativity flow! Add more or less depending on your taste.


- Stencil - If you're new to painting you may initially find the above a little intimidating. If that's the case, you could blend the edges with a stencil. Heather from HC Creations has made Mr Rio "pop" with her blending and stencil background. Heather has been able to blend the edges and create an original look for her Mr Rio Canvas. We love how the stencil blending has made Mr Rio project forward as the hero of this artwork. Be inspired by Heathers creativity.

8. Seal the Enchantment
When you've reached this point of your project, and satisfaction sparkles in your eyes, apply a good quality sealer over the weave and your entire piece. For added protection, 1-3 coats are recommended – the more, the merrier! We give a very light sand in between coats with our 340 grit Artisan Prep Pads for that extra smooth touch.
9. Smooth Finishing Touch
For an extra smooth finish, lightly sand with a 340 grit sanding pad, after your final clear coat. It's the finishing touch that ensures your furniture feels as magical as it looks.
Last but not least, If you have any excess, save those pieces of decor weave to use on small projects. We like to upcycle coasters.
Enjoy Your Project!!
Click here to find our latest specials on Hokus Pokus Products.
Words of Encouragement: With every project, with every attempt at trying something new and with every boo boo, you’ll become a better artist with better skills!

